


Photo by Venti Views on Unsplash
The power of Dev Containers
What is a Dev Container, and how it can simplify the developer's work? These and other questions find response in this article.


In this article, we're going to explore the power of Dev Containers, what they are and how they can be used.
What Dev Containers are?
During my work days, I often read about dev containers, but I never used them. So, I started studying and experimenting with them, and I found out that are an extremely useful tool!
If we want to use an "official" definition, we can use the one that containers.dev gives us on their website:
A Development Container (or Dev Container for short) allows you to use a container as a full-featured development environment. It can be used to run an application, to separate tools, libraries, or runtimes needed for working with a codebase, and to aid in continuous integration and testing. Dev containers can be run locally or remotely, in a private or public cloud, in a variety of supporting tools and editors.
So, dev containers use Docker to create a complete development environment.
When I work on a new repository/project I usually create a new virtual environment through the specific tools of the programming language I'm using. For example, I use the same version of Python and I only handle different requirements in different virtual envs. Instead, when I also needed to use different versions of the same programming language, it was always a tricky and unfriendly process. Plus, a lot of time I had to deal with conflict problems, and the idea of having my system "dirty" due to all the tests and configurations I did to make all things work was always a fact that I didn't like, but I had to live with it.
When I discovered dev containers, I found a perfect solution for this use case! In fact, with dev containers, you can configure a complete development environment, defining programming language version, dependencies, additional requirements, tools for your editor (yes, you can run an editor inside your dev container) and a lot more! You can keep two (or more) different versions of the same programming language using two (or more) dev containers without running into conflicts or other similar problems. And the same thing is valid for libraries and applications.
Another advantage of using Dev Containers is that you configure them once, and every time they can prepare your dev environment in a few seconds, re-installing all your necessary tools, even if you change machine/system/workstation. If you work with another colleague, you can be sure you're using the same environment sharing the same dev container definition (you can commit it).
Naturally, there are also some disadvantages. Using dev containers means adding an overhead between you and your code or running application, and also adding a bit of complexity due to the configuration.
How Dev Containers are defined and created?
Going back to containers.dev, it tells us also about Dev Container Specification:
The Development Containers Specification seeks to find ways to enrich existing formats with common development specific settings, tools, and configuration while still providing a simplified, un-orchestrated single container option – so that they can be used as coding environments or for continuous integration and testing. Beyond the specification's core metadata, the spec also enables developers to quickly share and reuse container setup steps through Dev Container Features and Templates.
So, there is a specification that is used to write dev container configuration files. They are basically JSON files that contain the details of our dev container: base image, the programming language version, dependency to install, tool to set up, post-creation script to run, and so on. Here you can find the complete reference.
You can write the dev container config file on your own, or (suggested) you can use functionalities like the one offered by VSCode to create config files with a few clicks and then edit and personalize them deeper. There are
In the following Getting Started, we will use this second method.
Getting started
Ok, now that we know about Dev Containers and their features, advantages and power, it's time to get our hands dirty playing with them.
Pre-requisites:
Visual Studio Code
Docker (or another container engine)
Dev Containers extension for Visual Studio Code
The extention for VSCode allows you to open any folder inside (or mounted into) a container and take advantage of Visual Studio Code's full feature set. So you will have an instance of VSCode (with all the extensions you want) running inside the dev container, without impacting the dev experience.
Create Dev Container
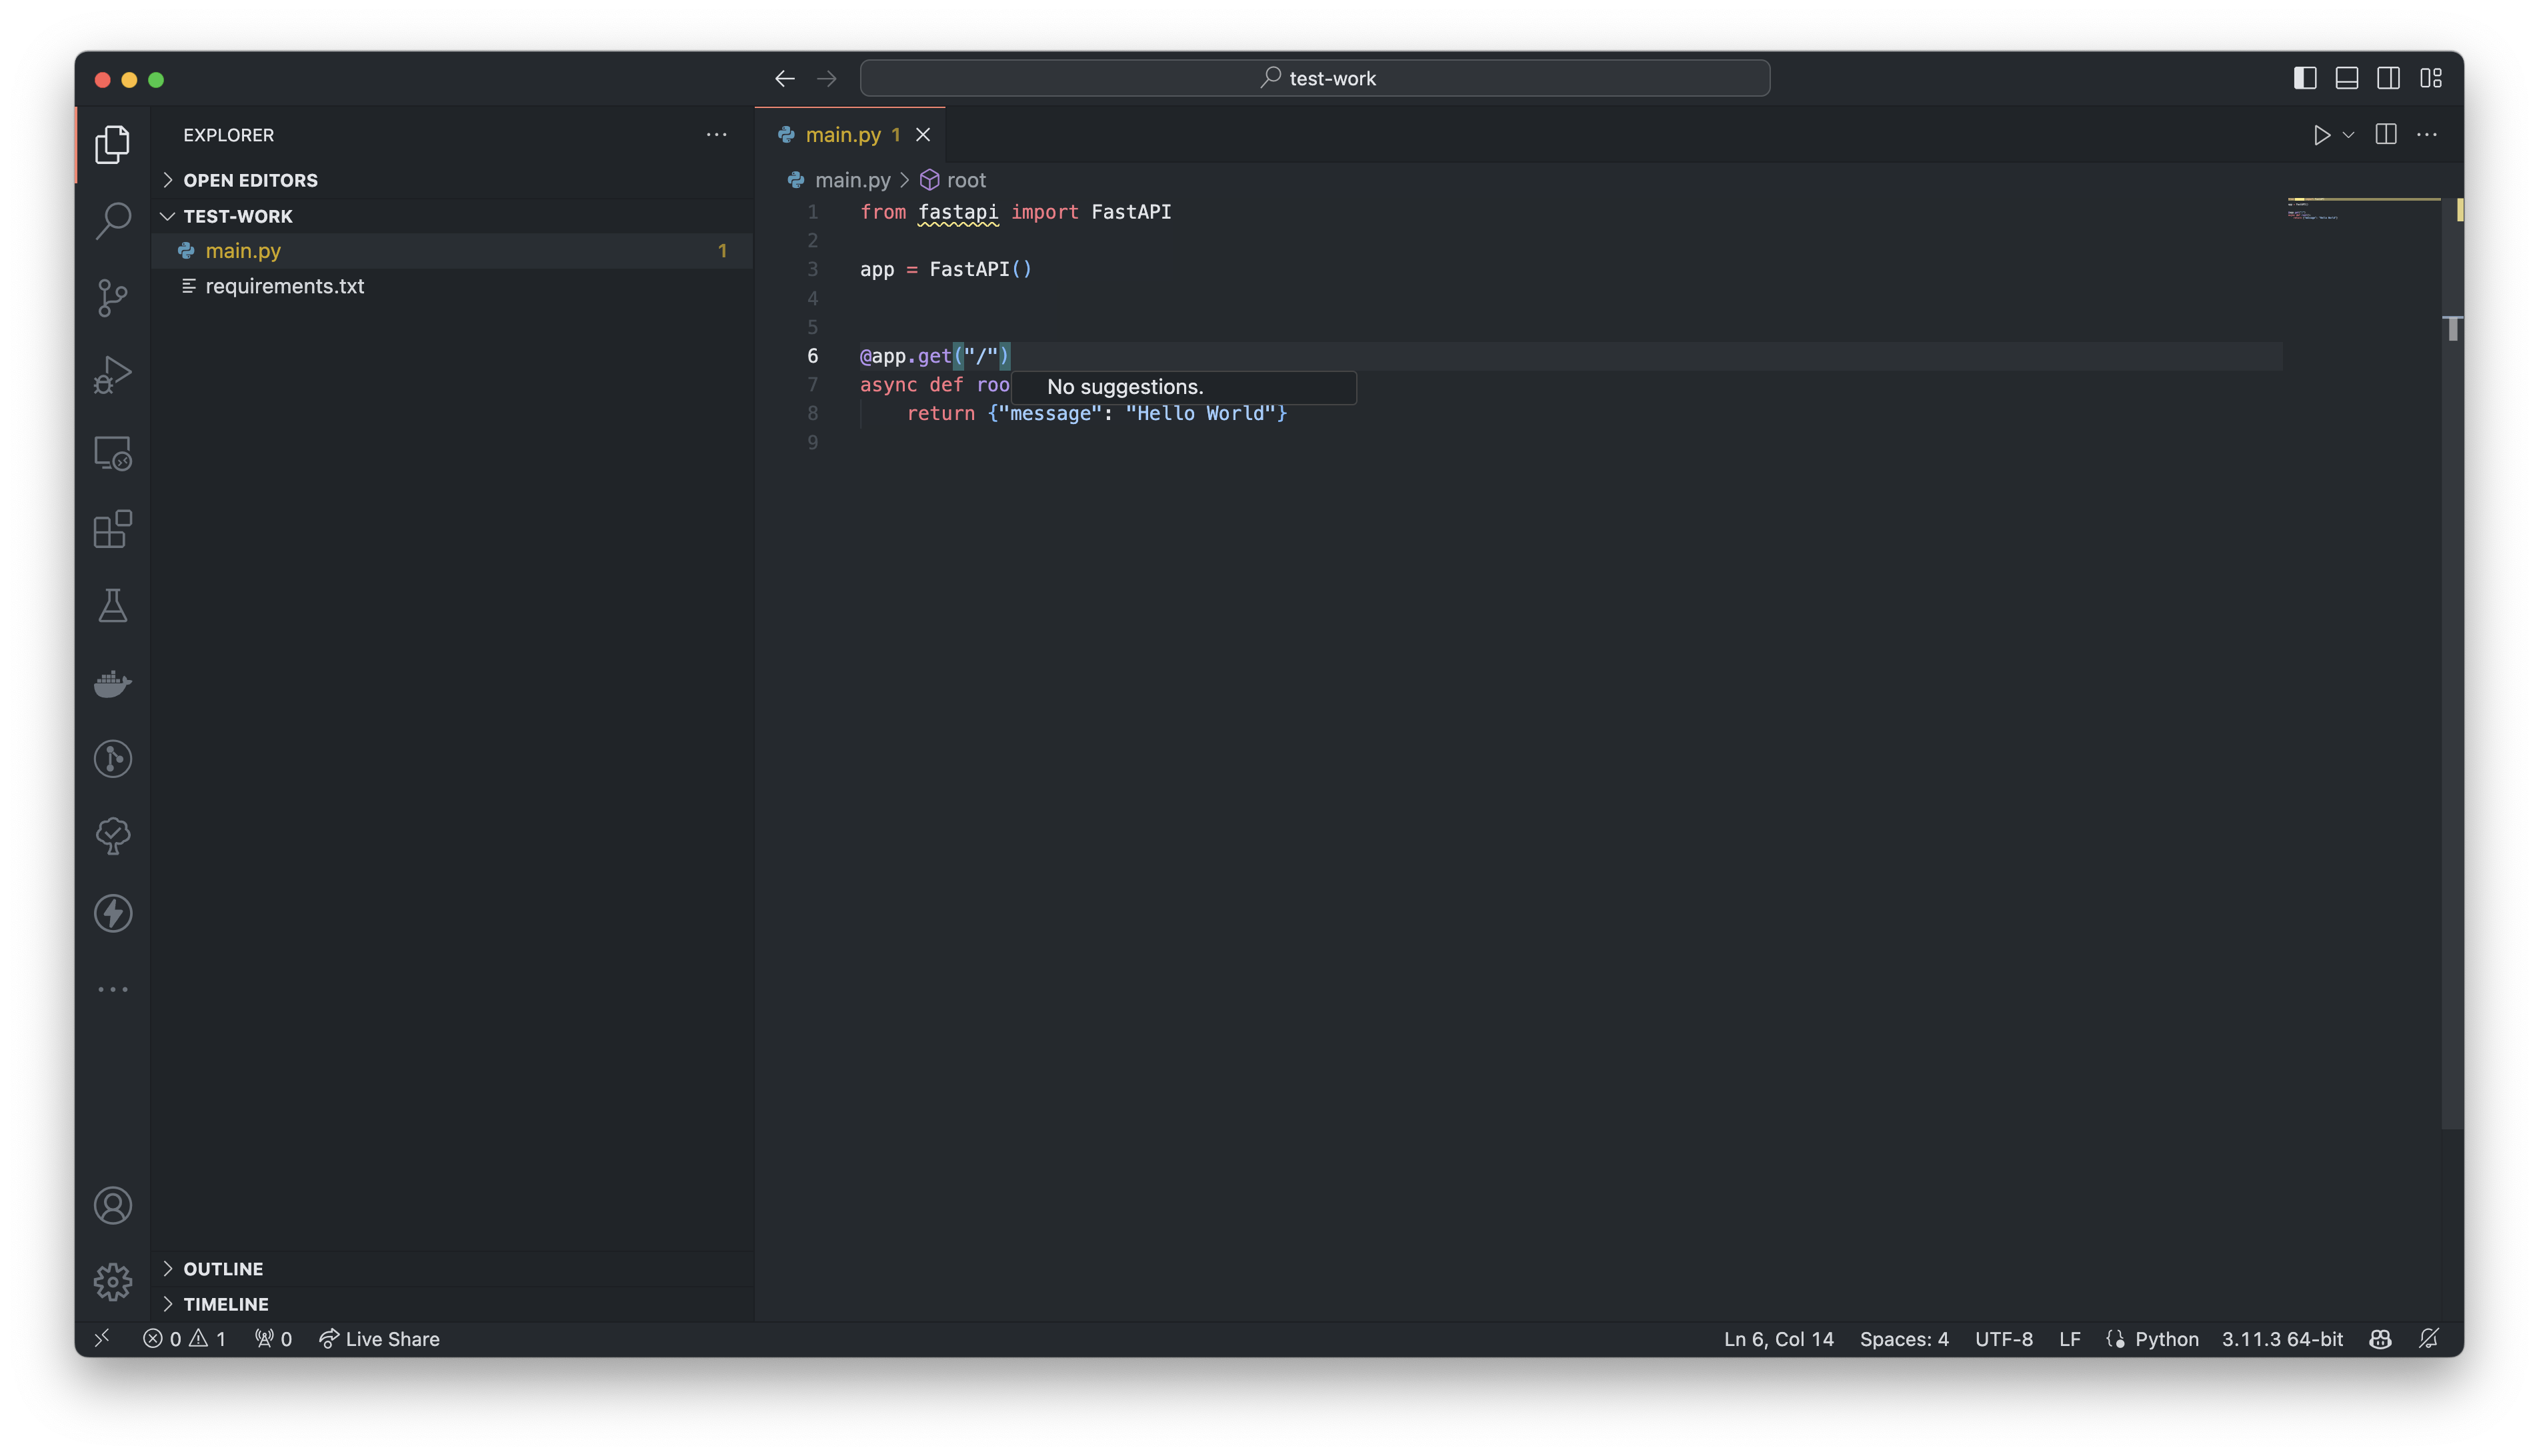
First, open a project with VSCode. For example, we can create a little test project with some simple requirements (fastapi and uvicorn).
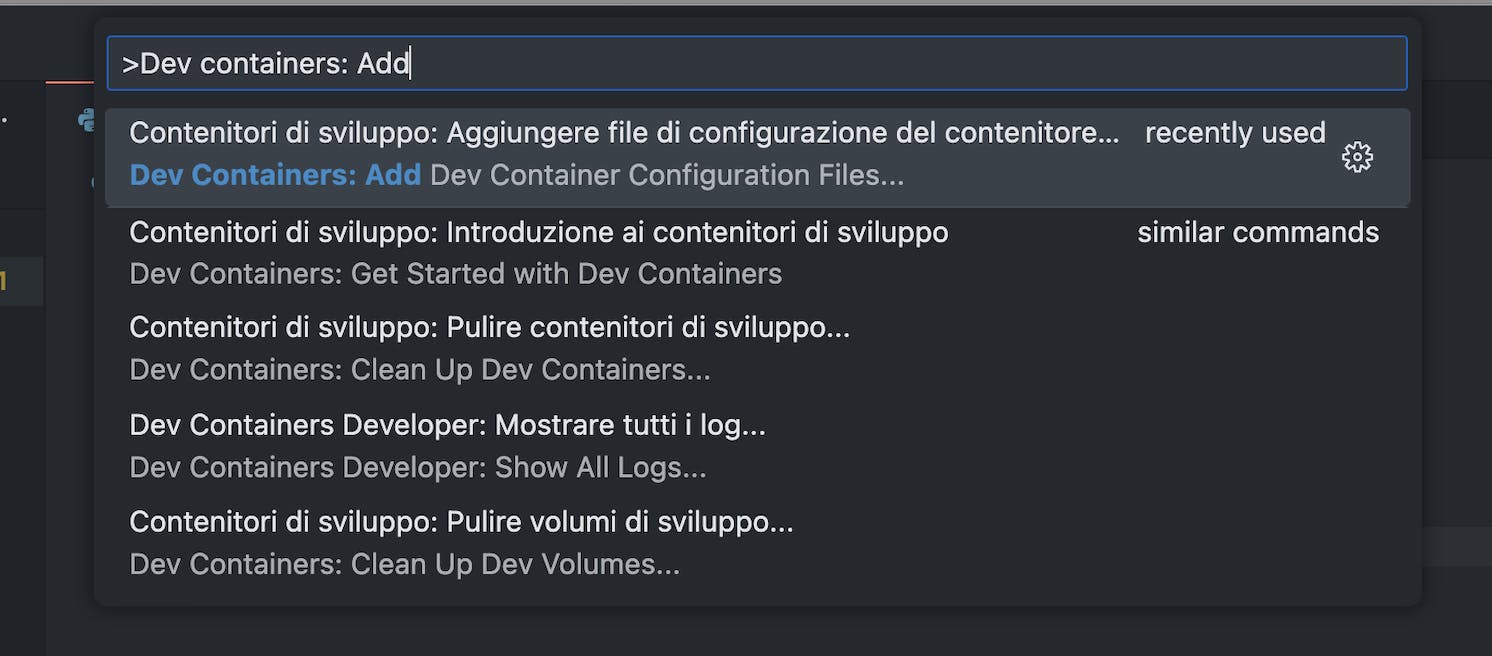
So, from VSCode, press cmd + shift + P and search "Dev containers: Add Dev Container Configuration Files...". It will guide you to the creation of a dev container.
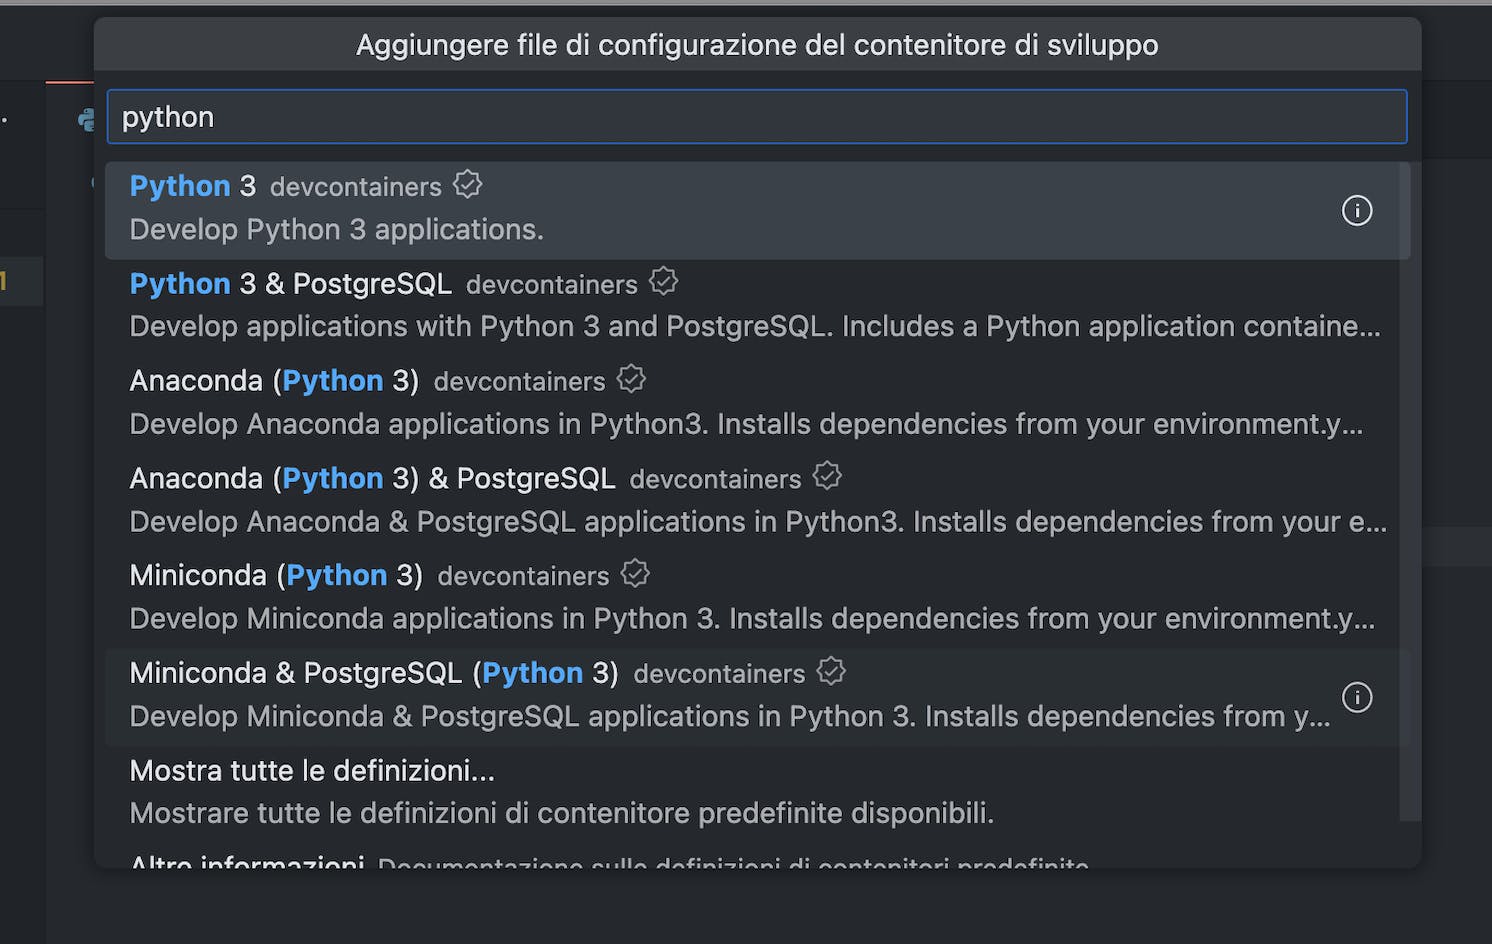
Then, select the desired environment. We can choose Python 3.
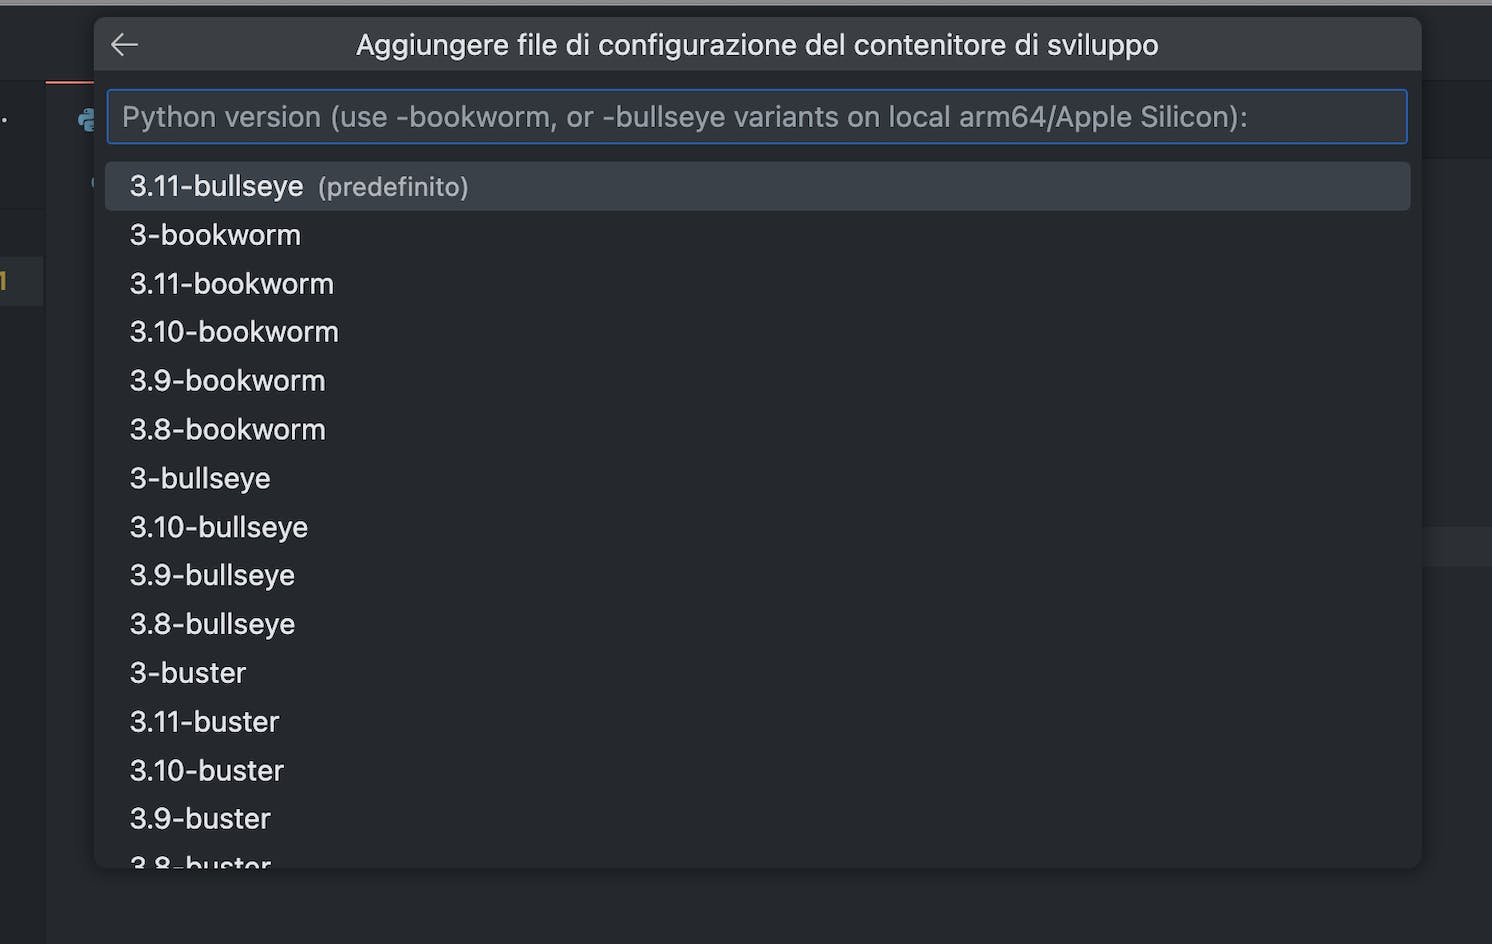
It will ask for a specific Python version to use, select the one you want.
If it asks you to install extensions, simply press Enter without selecting anything, we're going to cover this topic later.
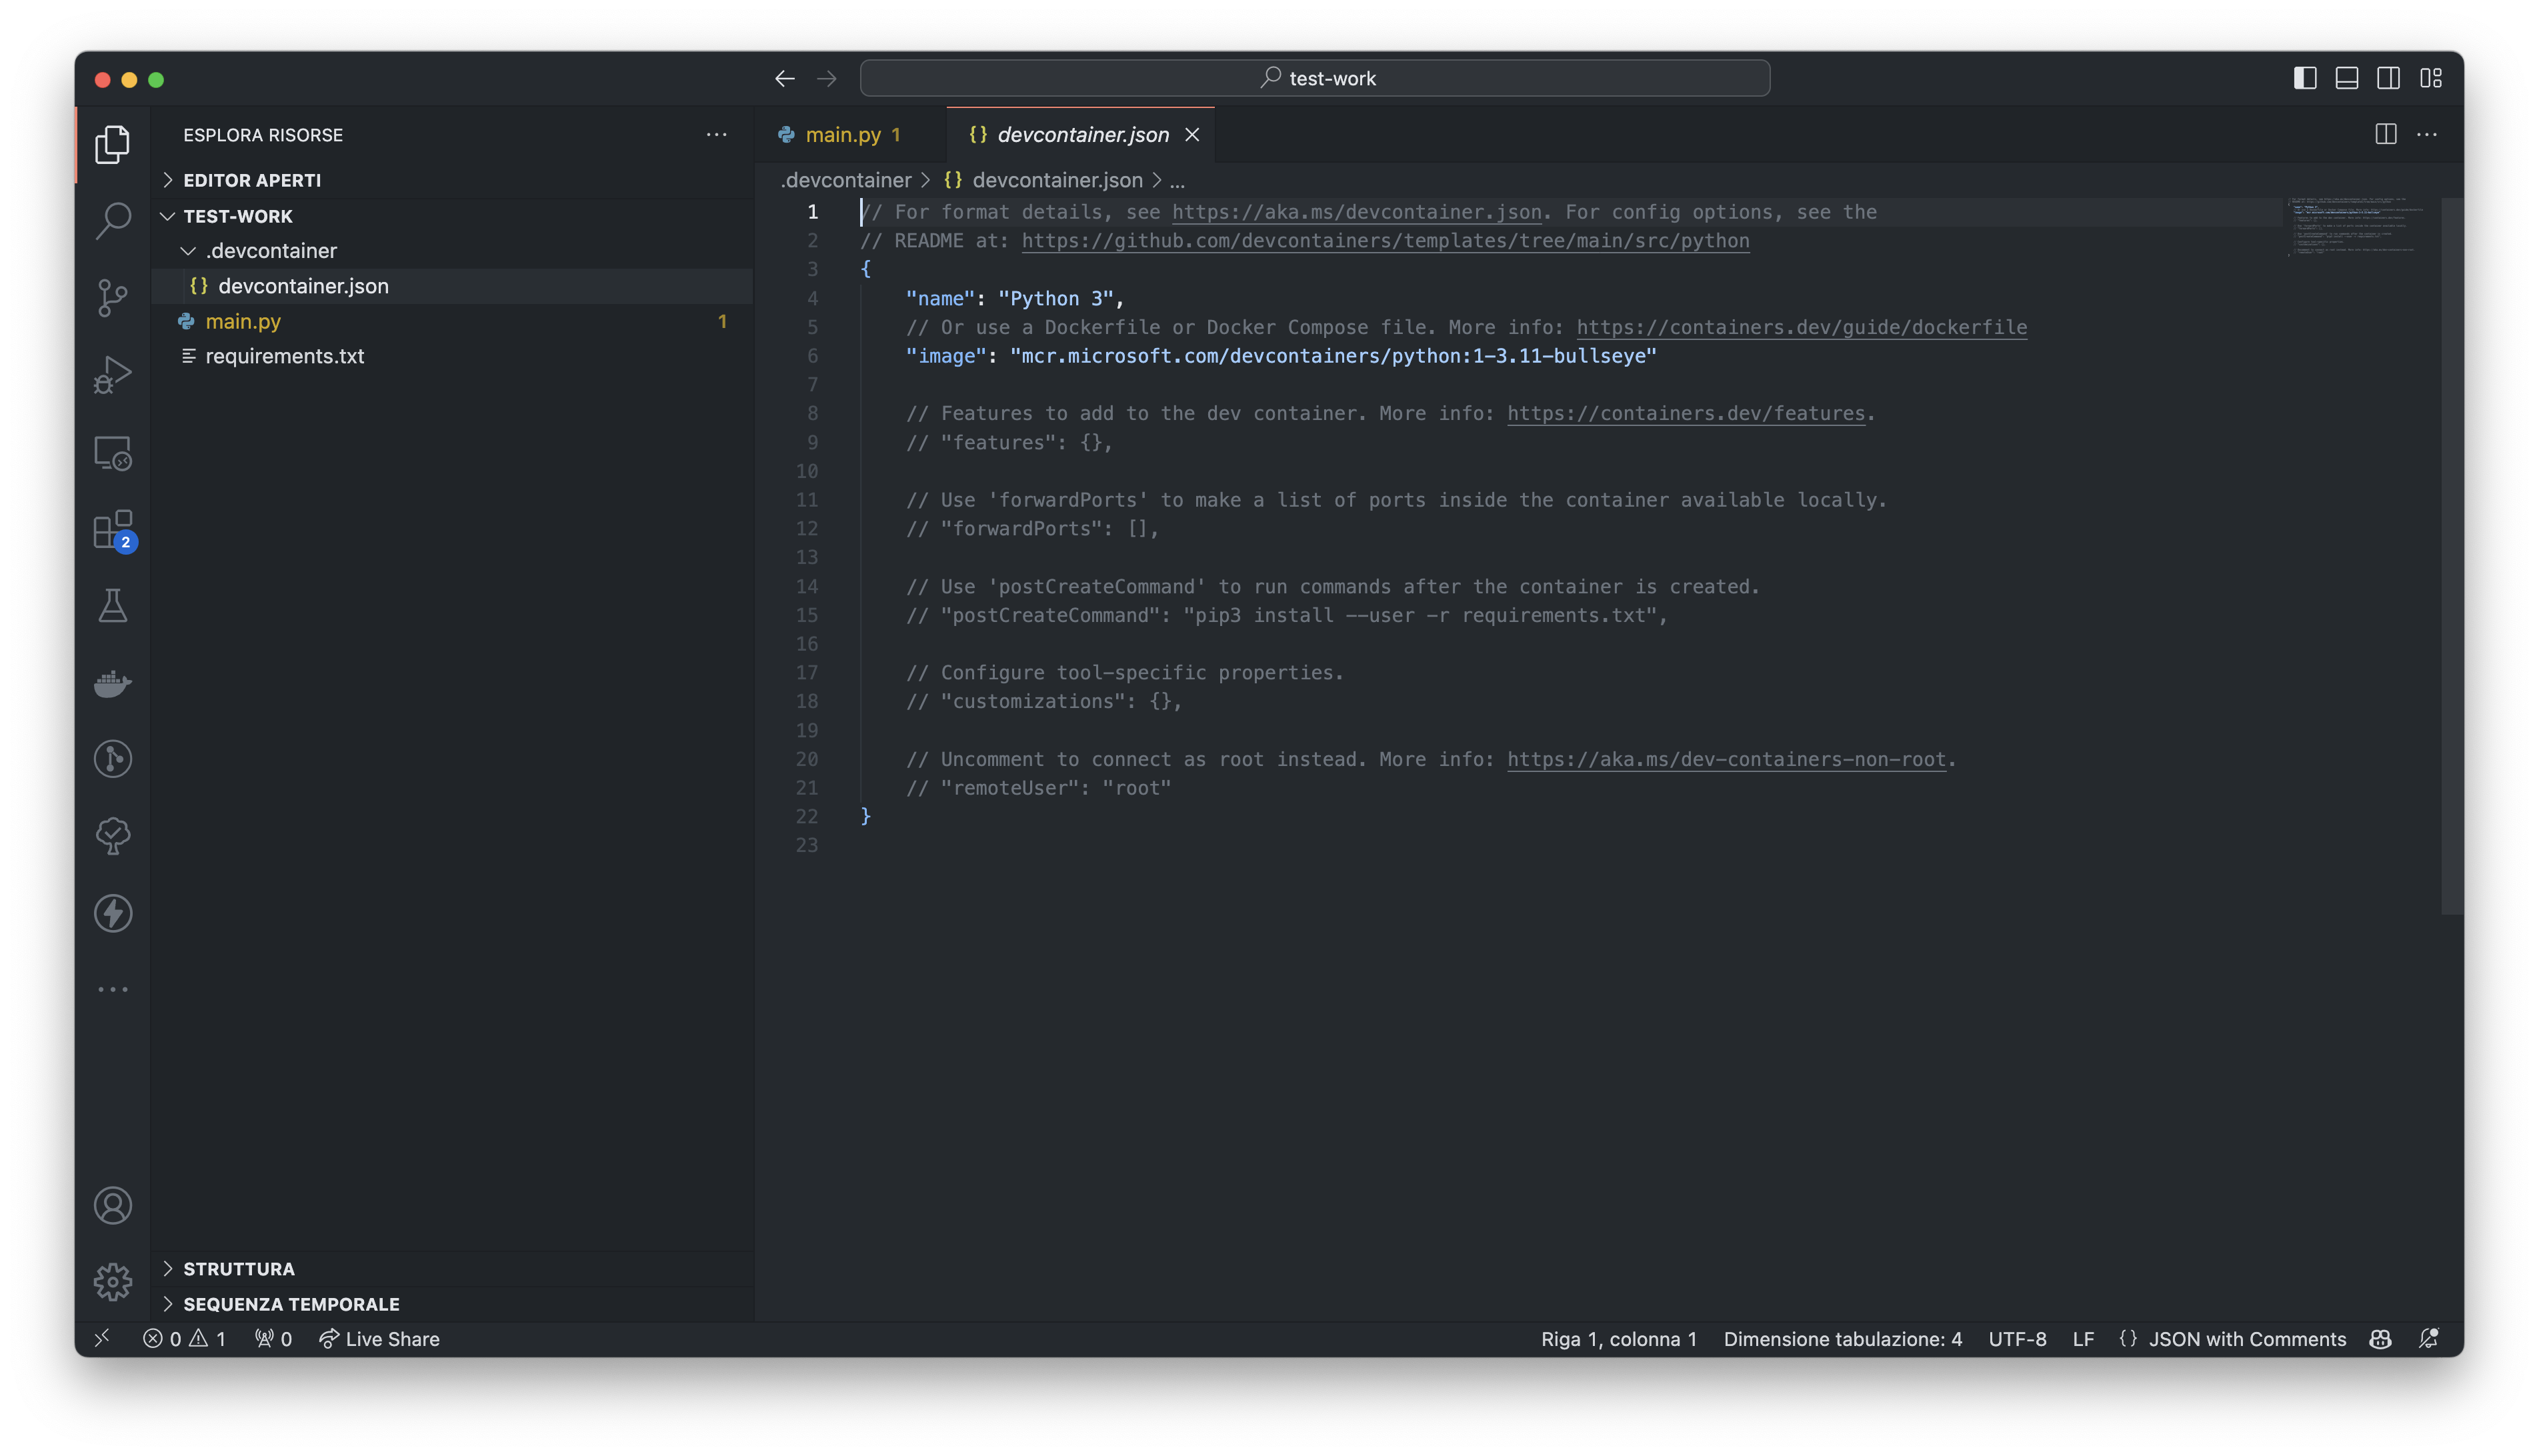
Et voilà, a new file is added to your directory at the path .devcontainer/devcontainer.json and it contains a basic config with some sections commented.
Add Dev Container features
The Features are self-contained and sharable units of installation code (and config) that allow you to simply add features, tools or runtime to your dev environment.
If you already know which feature you need, you can select them when you're creating the dev container. Otherwise, you can add them later using the VSCode command "Dev Containers: Configure Container Features".
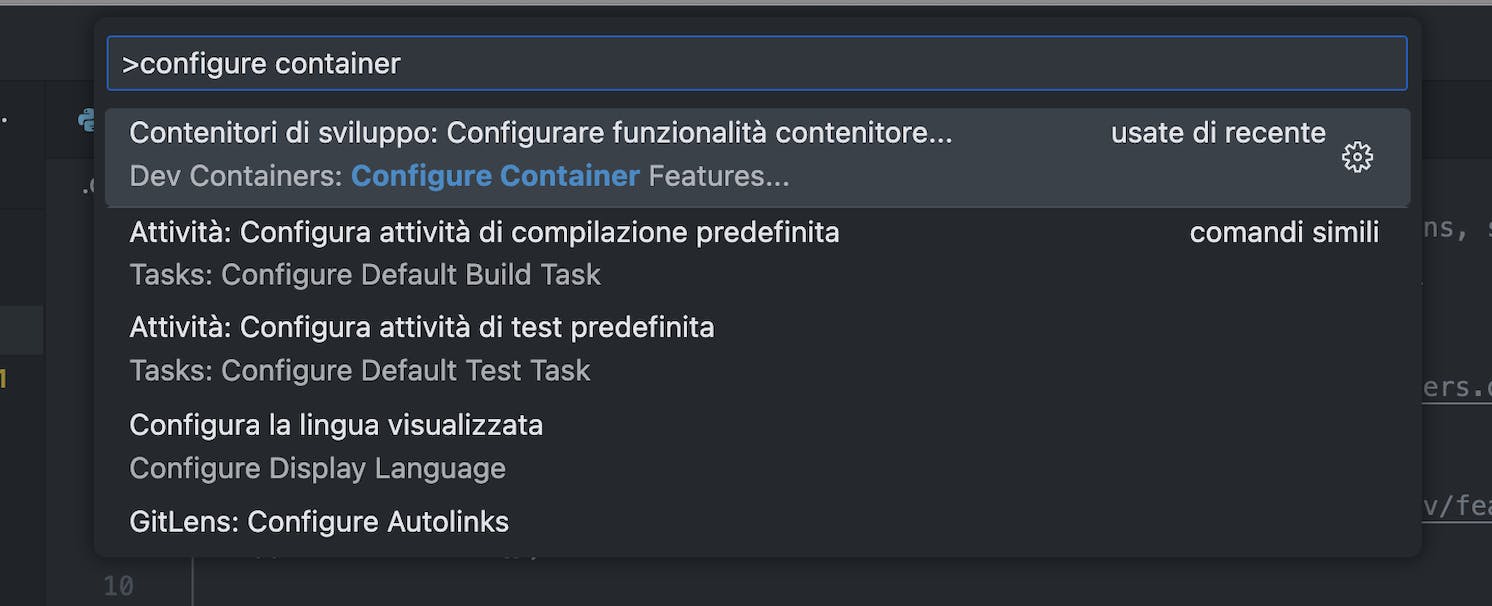
Here you can find the complete list of features available: https://containers.dev/features.
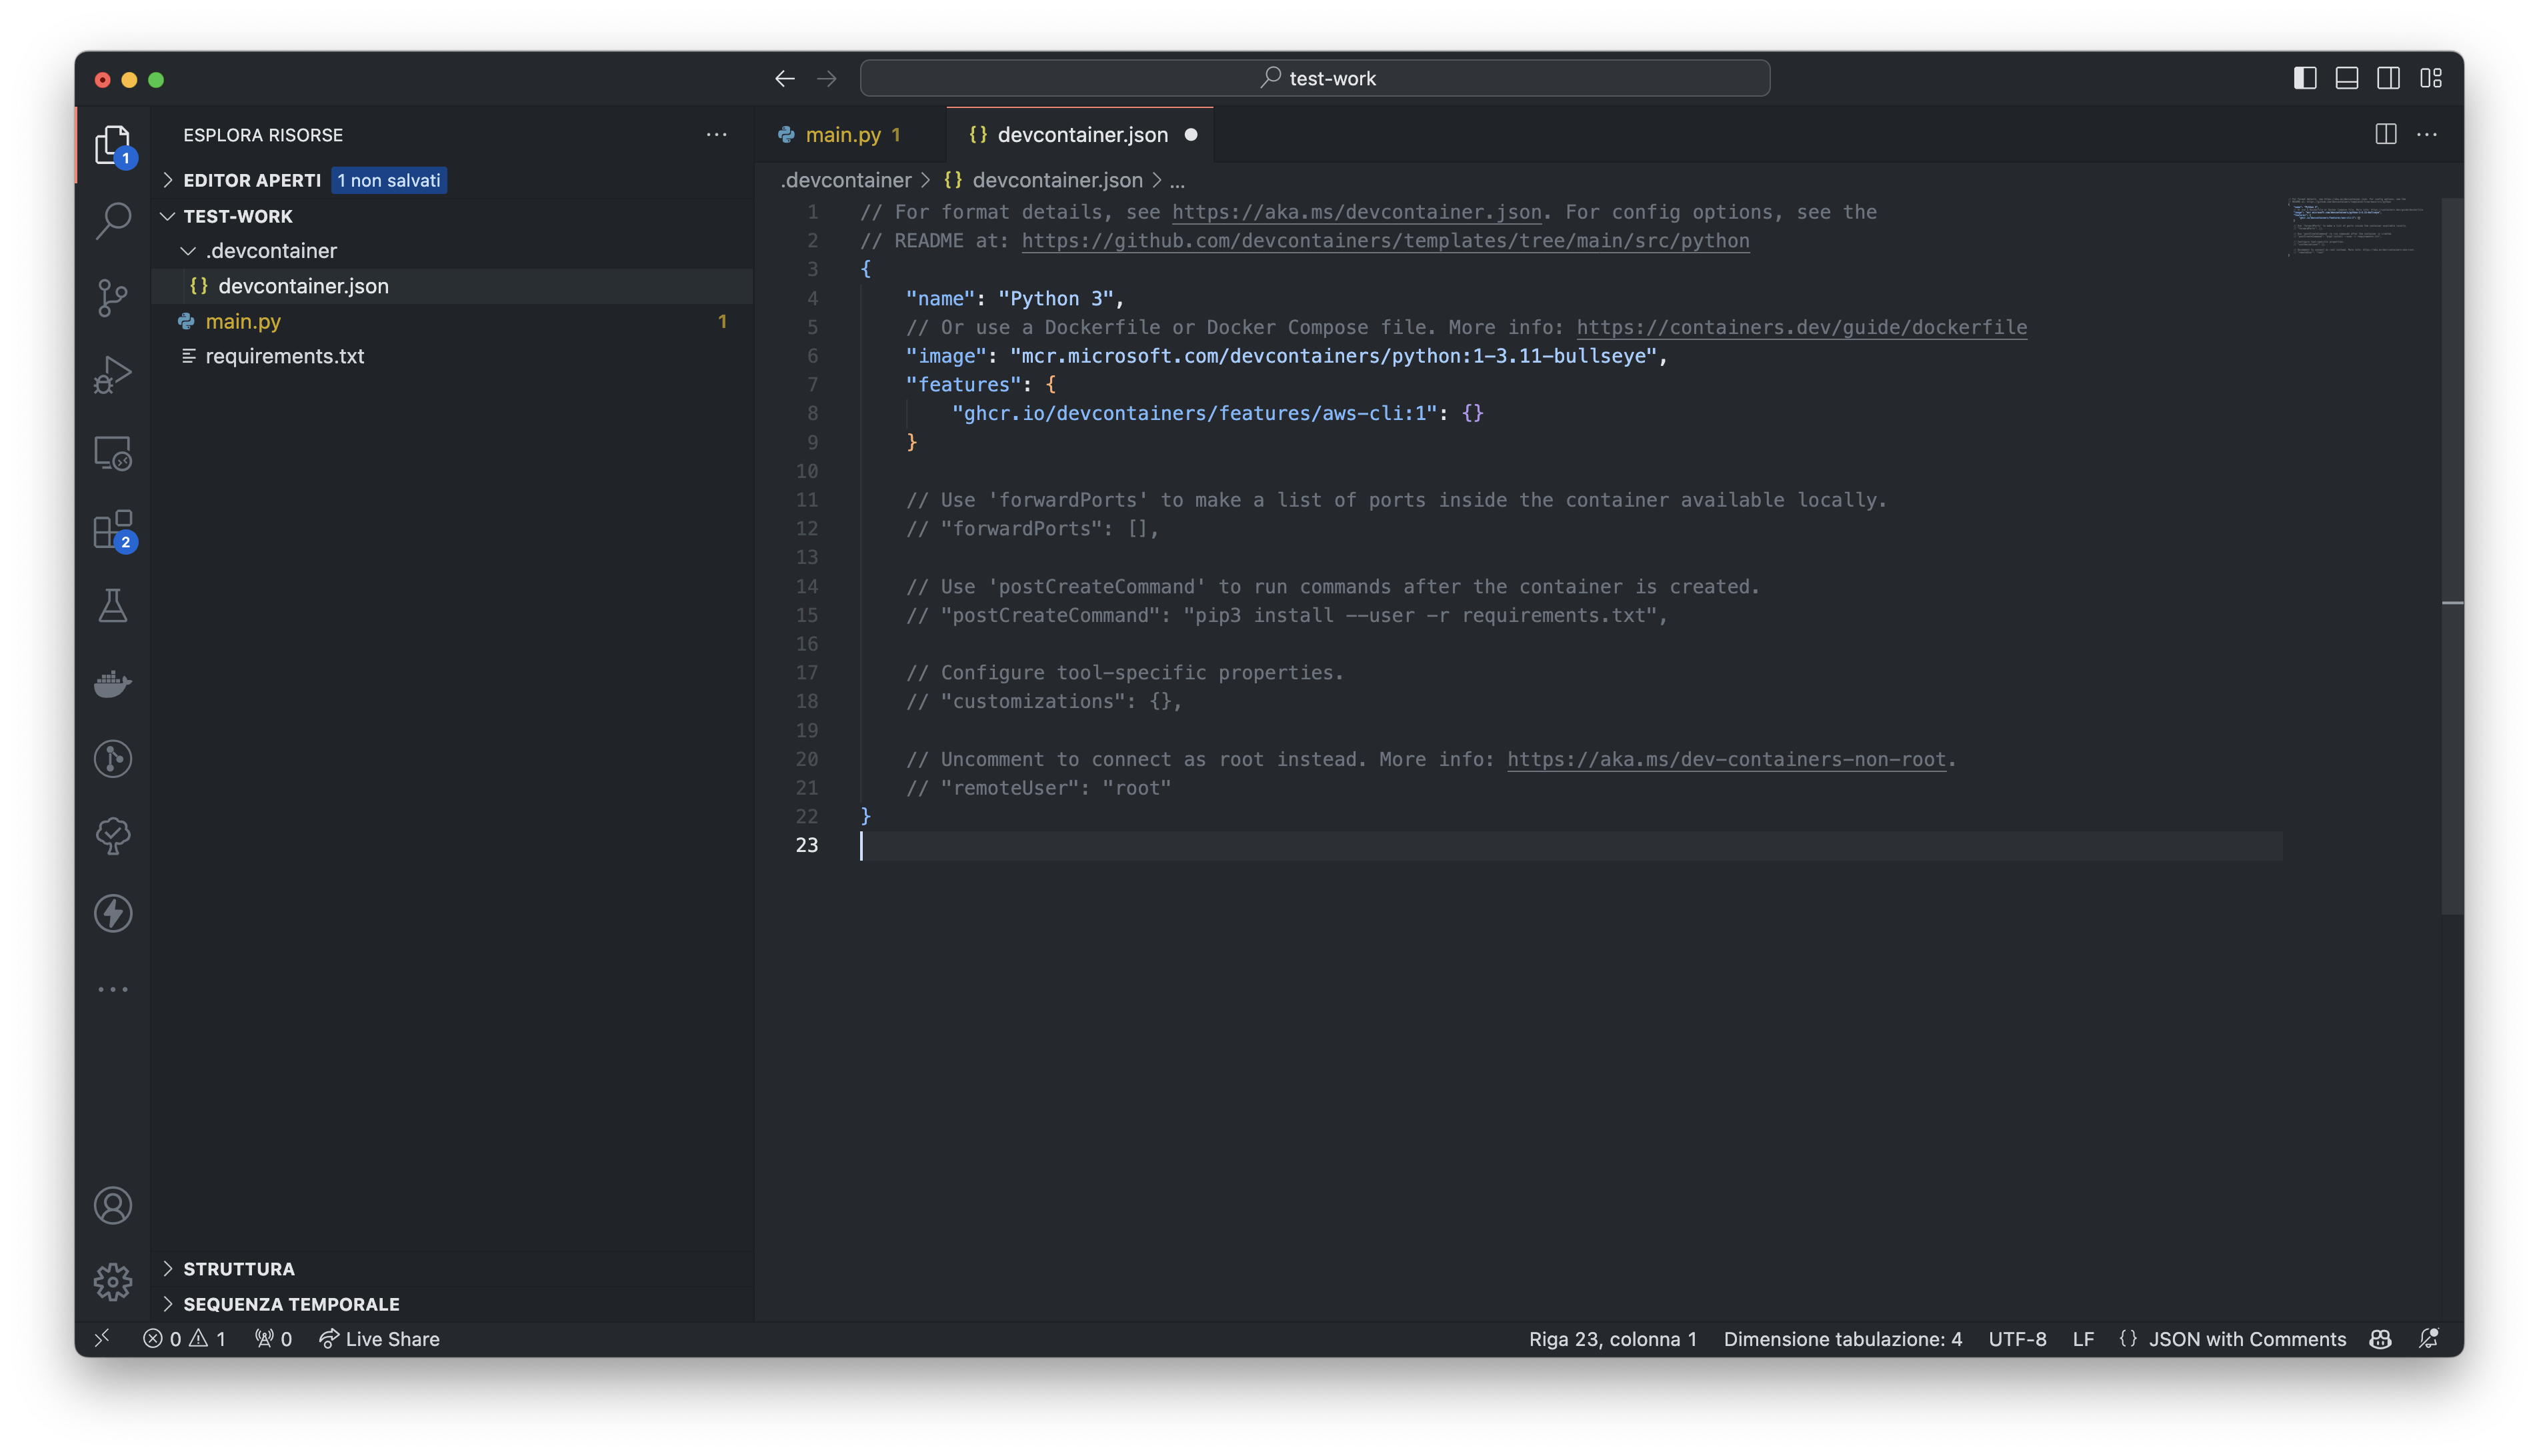
When you select a feature, it will be added automatically to your container definition. For example, we can select a feature to install aws cli on the dev container.
Customizations
In addition to the features, you can customize your dev container deeper.
You can define which ports must be forwarded. Since we're developing a web application, we want to expose the port 8000, where the app will be listening. So, we can add this to the config:
"forwardPorts": [
    8000
]
You can also do custom tasks defining a script or a command to execute after the creation of the container. For example, it can be useful if the container is already configured with all the requirements when we create it. So, we can add this to the config to execute a "pip install" after the container is created:
"postCreateCommand": "pip3 install -r requirements.txt"
You can also customize the instance of VSCode defining the extensions you want and setting properties. For example, we can add this to the config. It will install some extensions I use frequently and fix some settings:
"customizations": {
        "vscode": {
            "extensions": [
                "eamodio.gitlens", // IDE Git information
                "davidanson.vscode-markdownlint",
                "ms-azuretools.vscode-docker", // Docker integration and linting
                "shardulm94.trailing-spaces", // Show trailing spaces
                "Gruntfuggly.todo-tree", // Highlights TODO comments
                "bierner.emojisense", // Emoji sense for markdown
                "stkb.rewrap", // rewrap comments after n characters on one line
                "github.vscode-pull-request-github", // Github interaction
                "redhat.vscode-yaml", // Kubernetes, Drone syntax highlighting
                "bajdzis.vscode-database", // Supports connections to mysql or postgres, over SSL, socked
                "IBM.output-colorizer", // Colorize your output/test logs
                "github.copilot", // AI code completion
                "mohsen1.prettify-json" // Prettify JSON data
            ],
            "settings": {
                "files.eol": "\n",
                "editor.formatOnSave": true
            }
        }
    }
At the end of the configuration process, the devcontainer.json file is:
// For format details, see https://aka.ms/devcontainer.json. For config options, see the
// README at: https://github.com/devcontainers/templates/tree/main/src/python
{
    "name": "Python 3",
    // Or use a Dockerfile or Docker Compose file. More info: https://containers.dev/guide/dockerfile
    "image": "mcr.microsoft.com/devcontainers/python:1-3.11-bullseye",
    "features": {
        "ghcr.io/devcontainers/features/aws-cli:1": {}
    },
    // Use 'forwardPorts' to make a list of ports inside the container available locally.
    "forwardPorts": [
        8000
    ],
    // Use 'postCreateCommand' to run commands after the container is created.
    "postCreateCommand": "pip3 install -r requirements.txt",
    // Configure tool-specific properties.
    "customizations": {
        "vscode": {
            "extensions": [
                "eamodio.gitlens", // IDE Git information
                "davidanson.vscode-markdownlint",
                "ms-azuretools.vscode-docker", // Docker integration and linting
                "shardulm94.trailing-spaces", // Show trailing spaces
                "Gruntfuggly.todo-tree", // Highlights TODO comments
                "bierner.emojisense", // Emoji sense for markdown
                "stkb.rewrap", // rewrap comments after n characters on one line
                "github.vscode-pull-request-github", // Github interaction
                "redhat.vscode-yaml", // Kubernetes, Drone syntax highlighting
                "bajdzis.vscode-database", // Supports connections to mysql or postgres, over SSL, socked
                "IBM.output-colorizer", // Colorize your output/test logs
                "github.copilot", // AI code completion
                "mohsen1.prettify-json" // Prettify JSON data
            ],
            "settings": {
                "files.eol": "\n",
                "editor.formatOnSave": true
            }
        }
    }
    // Uncomment to connect as root instead. More info: https://aka.ms/dev-containers-non-root.
    // "remoteUser": "root"
}
Start the Dev Container
Ok, now we're ready to start our Dev Container. Simply run the command "Dev Containers: Rebuild and Reopen in Container". It will start the container and configure your environment. This phase can take some minutes because it has to pull the Docker image, but you can read the logs to understand what is going on.
At the end, you will have your new Dev Container running and configured.
If you run docker ps in your terminal, you'll see the new container.
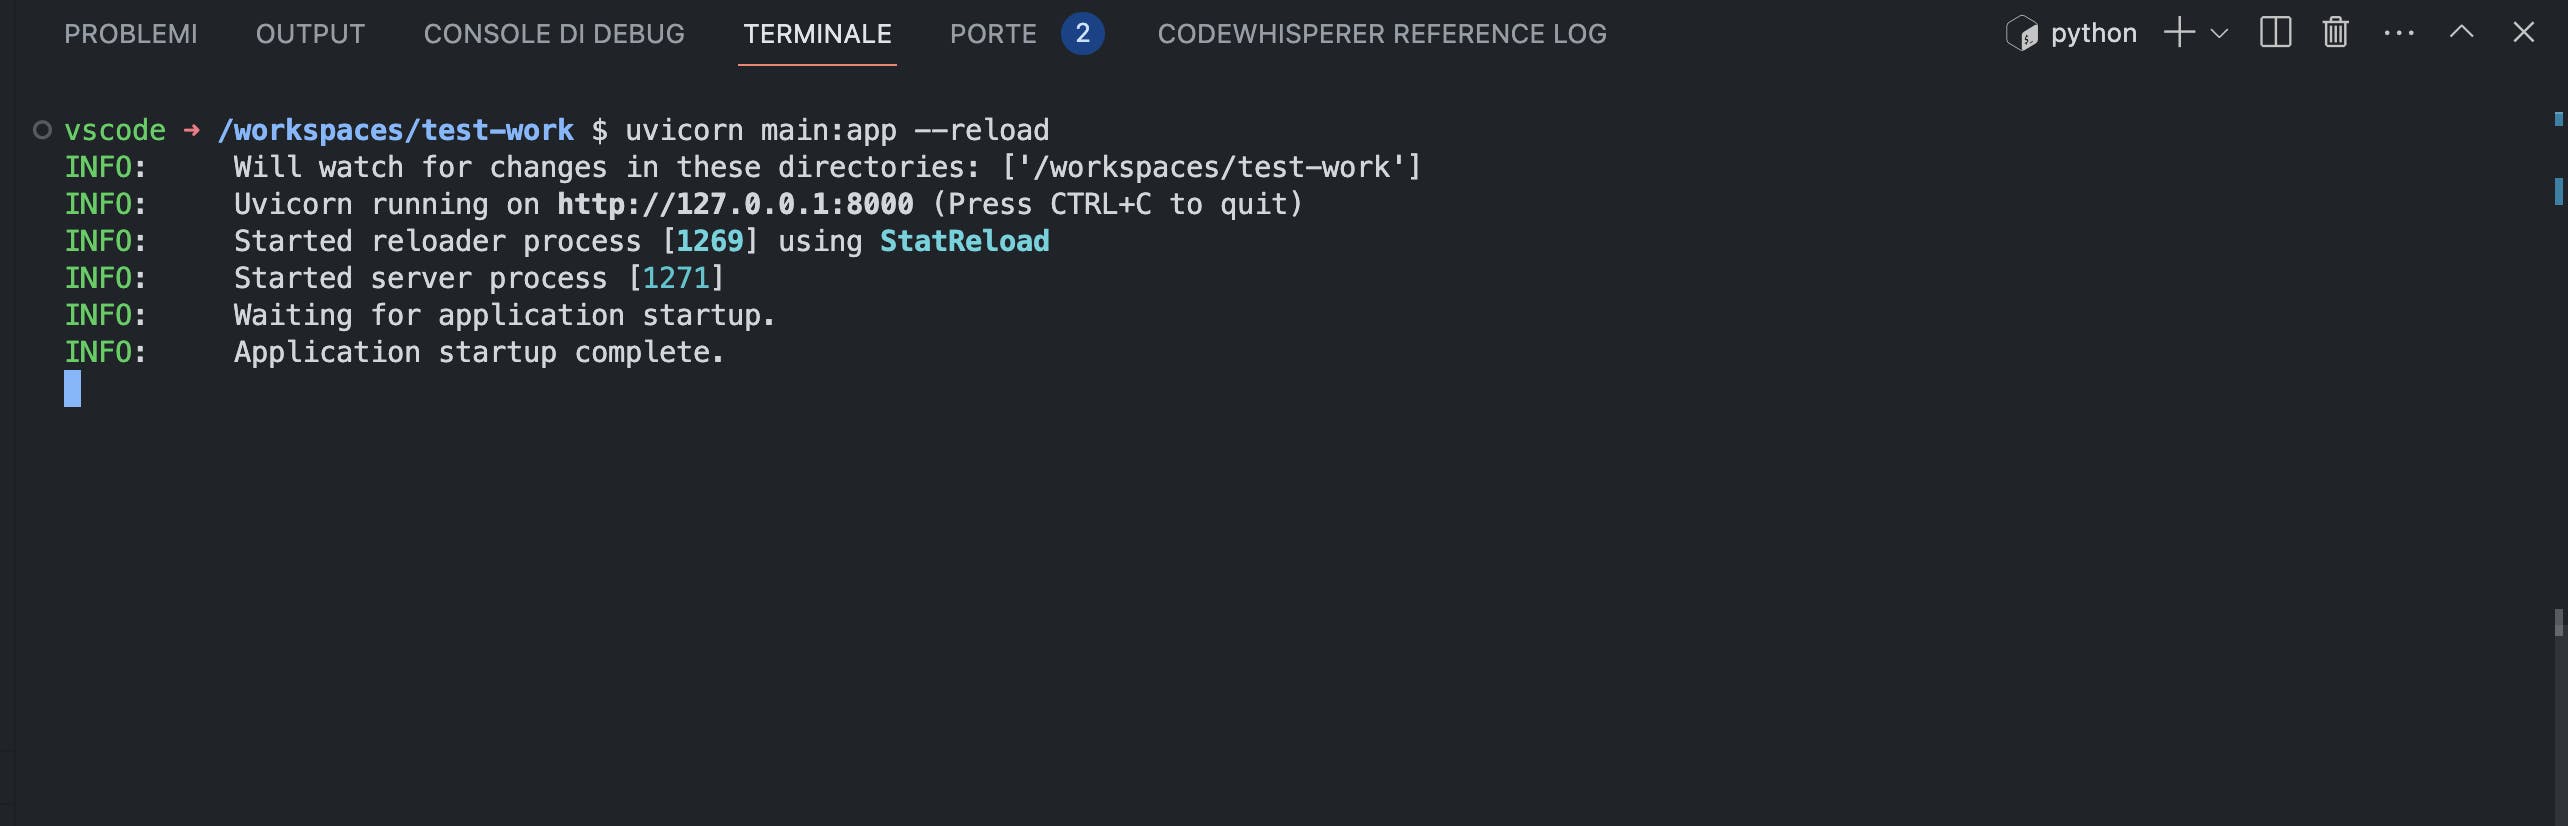
Without any other configuration, we can open the terminal and start our application.
Connect the Dev Container to another container
A lot of time happens that I have to develop an application with dependencies: database, task queue, external systems and so on. To run these dependencies locally, I found useful to use Docker containers.
The cleanest solution I found to run all in containers and make them reachable to each other, is to use a dedicated docker network.
For example, let's suppose our fastapi application needs a Postgres database. We can easily run it locally with this command:
docker run --name postgres -e POSTGRES_PASSWORD=mysecretpassword -p 5432:5432 -d postgres
After that, we can create a docker network called "dev"
docker network create dev
Now, disconnect containers from the default network (bridge) and connect them to the dev network
docker network disconnect bridge postgres
docker network disconnect bridge <your_dev_container_name>
docker network connect dev postgres
docker network connect dev <your_dev_container_name>
Now, the containers can reach each others using the name of the container as the hostname. For example, from our dev container, we can reach the Postgres database using the hostname postgres.
Conclusions
We explored the world of Dev Containers and played a bit with them. However, you will understand the power and utility of dev containers the more you use them. So, don't be afraid of experimenting with them and try to use Dev Containers in your projects. After a bit of configuration, you'll notice the benefits.